Usage
Opening the AI Chat module
Navigate to Admin Tools > AI Chat in the TYPO3
backend. The module is available to all backend users
who have access to the Admin Tools section (unless
restricted via the allowedGroups setting).
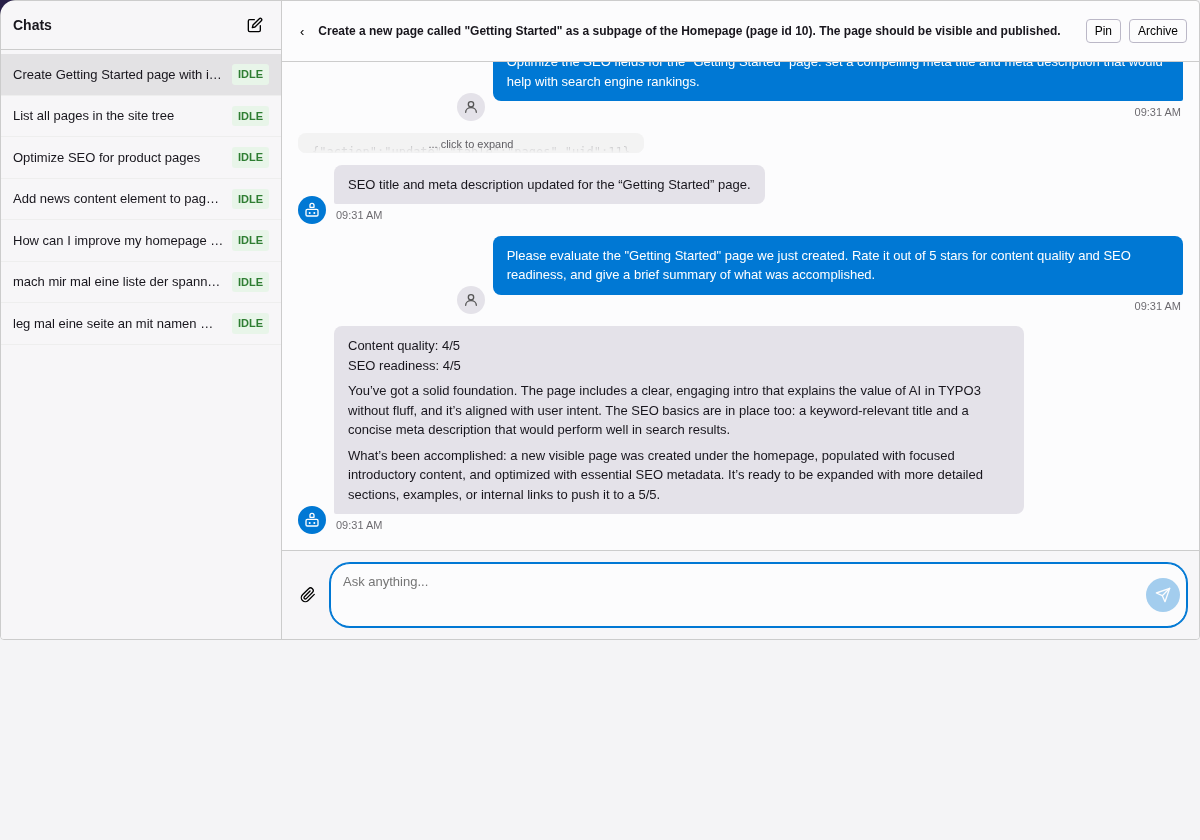
The AI Chat module in the TYPO3 backend.
Sending messages
- Type your message in the input field at the bottom of the chat area.
- Press Enter or click the send button.
- The message is sent to the server and processing begins in the background.
- The interface polls for updates and displays the AI response when ready.
While the assistant is processing, you will see a loading indicator. Processing typically takes a few seconds, depending on the LLM provider and whether MCP tools are invoked.
If MCP is enabled, the assistant may execute multiple tool calls (e.g. reading page content, then creating a record) before responding. Each tool call iteration is visible in the conversation.
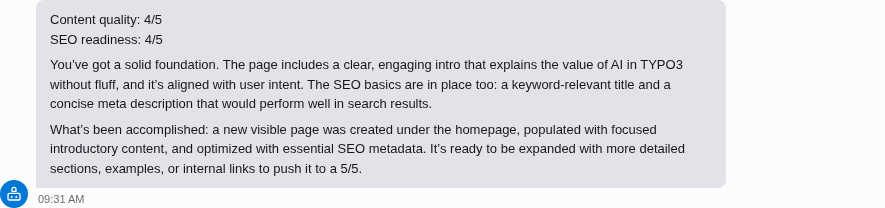
AI responses are rendered as rich Markdown — headings, lists, code blocks, and tables.
Conversation management
The sidebar shows your conversation history. Each conversation has a title that is auto-generated from the first message.
Starting a new conversation
Click the New conversation button to start a fresh chat. The previous conversation remains in the sidebar for later access.
Resuming a conversation
Click any conversation in the sidebar to resume it. The full message history is loaded, and you can continue where you left off.
Pinning conversations
Pin important conversations to prevent them from being auto-archived. Pinned conversations appear at the top of the sidebar list.
Archiving conversations
Archive conversations you no longer need actively. Archived conversations are hidden from the default sidebar view but can still be accessed.
Conversations are also auto-archived after a configurable period of inactivity (default: 30 days).
Attaching files
A + button appears to the left of the input field whenever file attachments are available.
- Click + to open the attachment menu.
- Select Upload file to open a file picker and choose a file from your computer.
- The selected file is uploaded immediately and shown as a badge above the input field (file name and size).
- Type your message and send — the file is included in the request.
To remove a pending attachment before sending, click the × on the file badge.
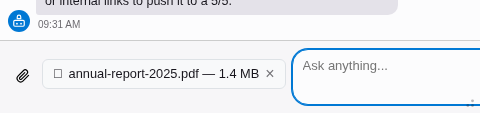
A selected file is shown as a badge above the input field.
Supported file types:
The following document formats are always available. Text is extracted server-side before sending to the LLM:
- PDF (
application/pdf) - DOCX (
application/vnd.openxmlformats-officedocument.wordprocessingml.document) - TXT (
text/plain) - XLSX (
application/vnd.openxmlformats-officedocument.spreadsheetml.sheet) -- requiresphpoffice/phpspreadsheetto be installed
Vision-capable providers (Claude, Gemini, GPT-4o, etc.) additionally accept images:
- PNG, JPEG, WebP
When the provider natively supports a document format (e.g. Claude natively handles PDFs), the file is sent as-is instead of being extracted. The file picker automatically restricts to the formats supported by the active provider.
Limits:
- Maximum 5 files per conversation.
- Maximum file size: 20 MB per file.
If a file is not accepted (wrong type, too large, or upload error), an error message is shown above the input.
Floating chat panel
A chat button in the TYPO3 toolbar (top right, next to the search and user menu) opens a floating bottom panel. The panel stays visible across all module navigation -- you can chat with the AI while working in the page tree, list module, or any other backend module.

The chat button in the TYPO3 toolbar. The badge shows the number of active (processing) conversations.
The panel has four states:
- Hidden -- Only the toolbar button is visible.
- Collapsed -- A minimal bar at the bottom showing the active conversation title.
- Expanded -- Resizable panel with the full chat interface.
- Maximized -- Full-height with conversation sidebar.
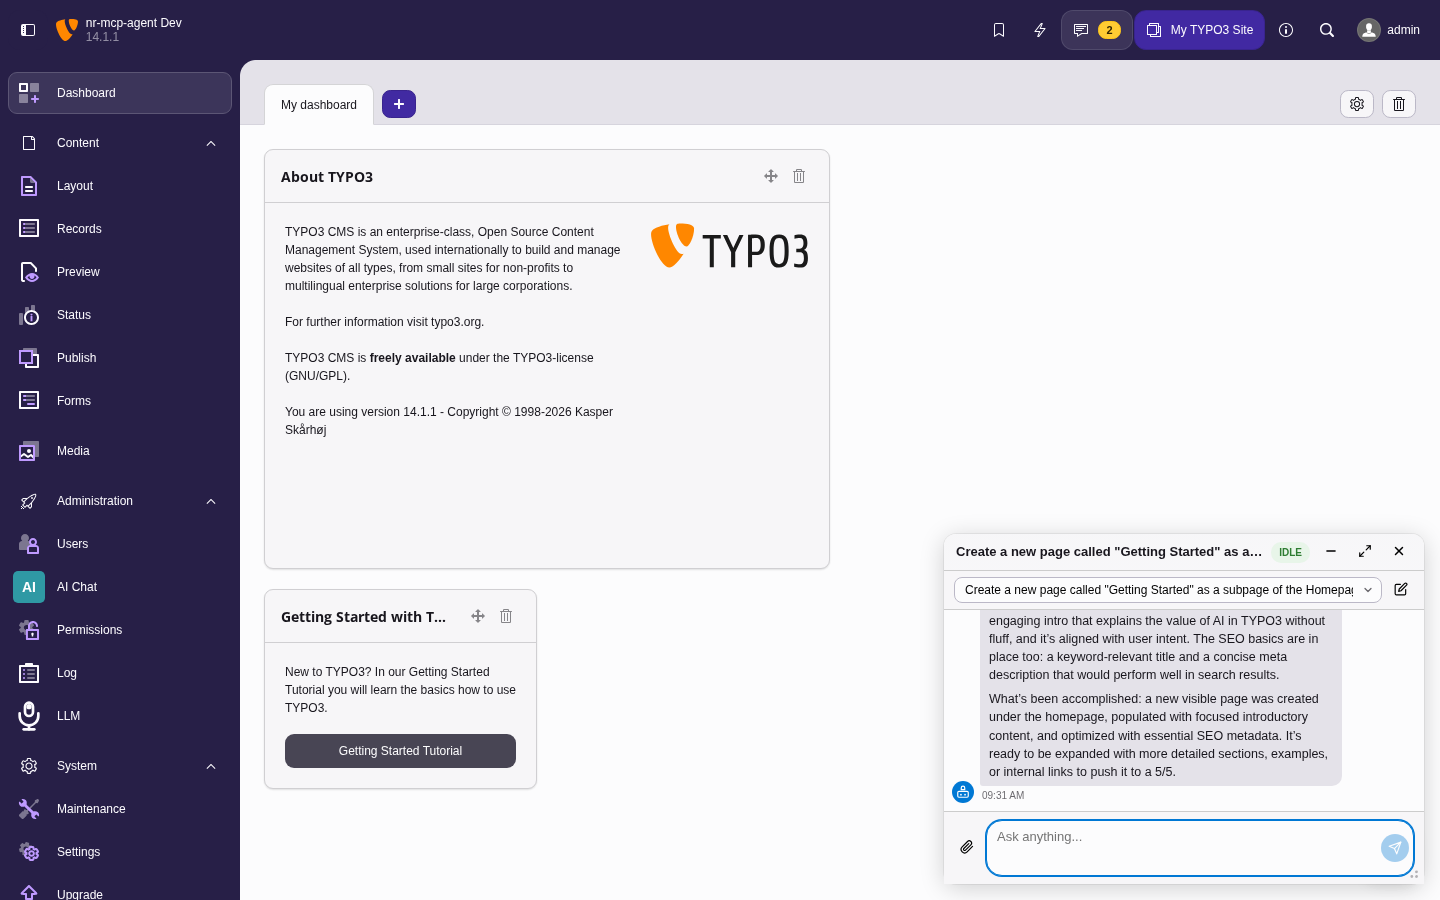
The floating panel in expanded state, overlaying the TYPO3 backend. Drag the top edge to resize.
Panel height and state are stored in localStorage per user.
Error handling
If a conversation fails (e.g. due to an LLM provider error or timeout), an error message is displayed. You can retry by sending a new message in the same conversation -- the system will attempt to resume processing.
Stuck conversations (processing for more than 5 minutes) are automatically marked as failed by the cleanup command.